Sennheiser PXC 550 Battery Replacement
Jun 16, 2020
After a few years of wearing my wireless headphones consistently, I reached the point where the battery wasn't holding a charge anymore. It could reach 25% at most, and so I'd need to swap it out.
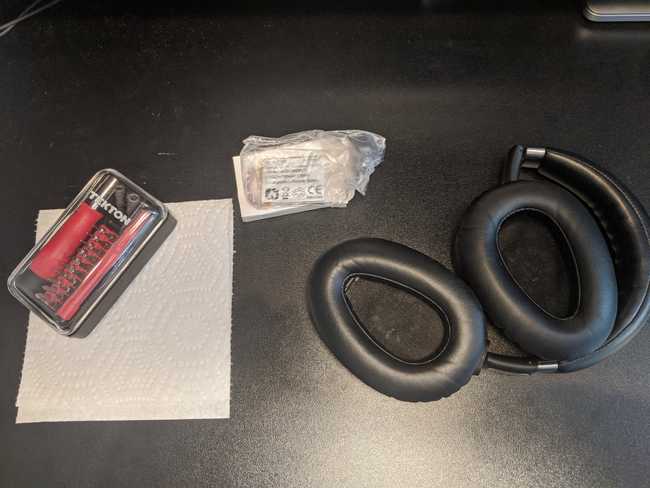
After buying a replacement battery on eBay (mine cost $23), I got to work.
If you are attempting this repair on your own, be sure to open the left side, which does not have the touch sensor or the charging port.
Tools I ended up using:
- Phillips-head screwdriver
- Tweezers
- Plastic spudger (wide, flat-head plastic tool often used to safely pry electronics apart)
- Hair dryer
- Credit card
- A knife (sharp, metal tool used to recklessly pry electronics apart)
- Double-sided tape
Step 1 - Ear Pads
You'll need to start by prying off the ear pad (also a great part to replace, if you're extending the life of your headphones). It takes a somewhat concerning amount of force, but they're designed to come off that way, so don't worry too much. I had good luck by placing my thumbs inside the cup at the narrow end and pushing out until the part popped off.
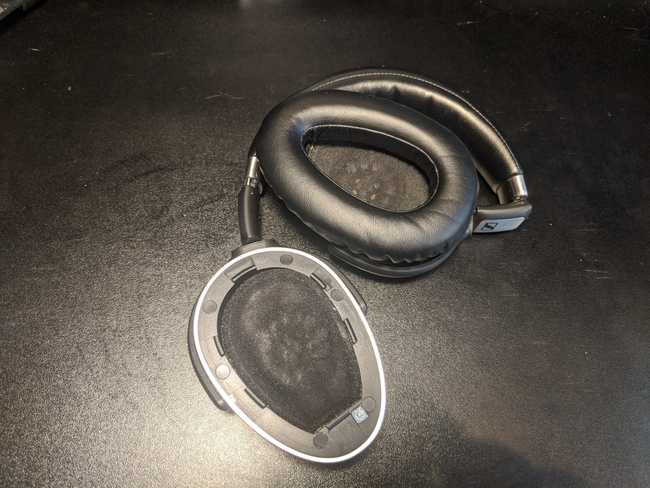
Step 2 - Screws
Next, you'll see 6 round stickers that are covering the screw holes. You'll need to remove them, which isn't very difficult with a pair of tweezers.
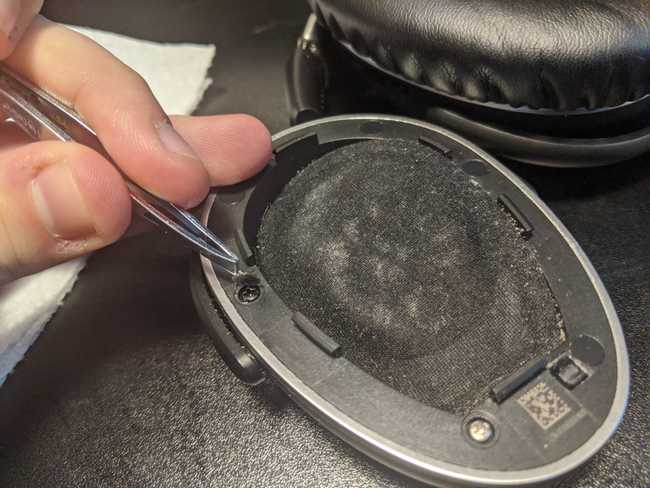
After you've removed them, remove the 6 screws. You should have 2 longer screws at the base, and four black screws at the head of the headphones.
Opening it up
To open the headphones up, you will need to pry the cup open, which has some light glue holding it together in addition to the screws. You'll need to get in between the silver and black plastic with something. Ideally you'll use a very professional metal spudger for this.
Once you've got the parts separated, work your way around to loosen the top. I used a plastic spudger once I had enough space to fit it in.
Next, you'll have to carefully open the cup. There are two sets of wires, and the short cable is fastened down. You'll need to carefully pull the short cable out of its grip before you can open it.
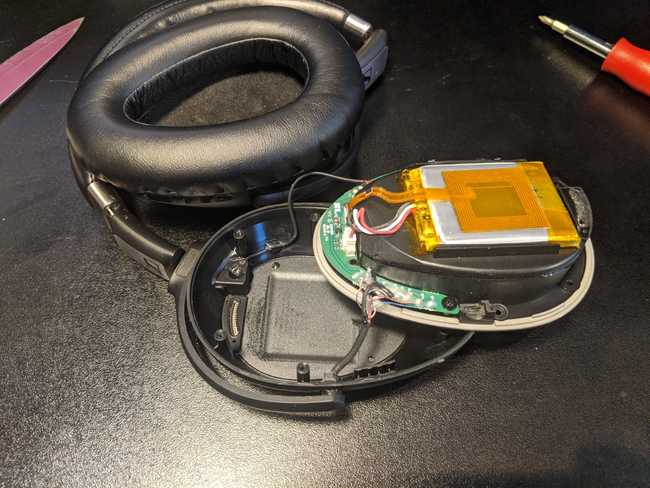
Note the short cable on the bottom side of the photo.
Removing the battery
From there, you will need to detach the cables. The ribbon cable requires you to raise the black tabs, and should slide out effortlessly once they are open. The three-wire connector is a bit awkward to get at, but lifts straight out without any gotchas.
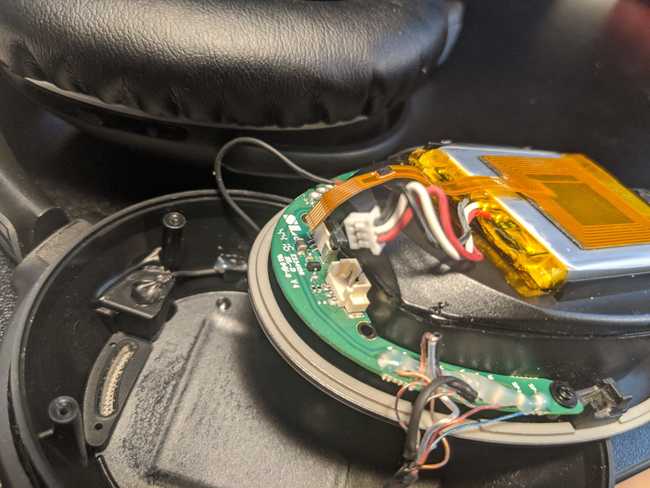
Both connectors removed
Now you've got to remove the battery. I used my spudger to get under it and carefully worked the glue apart until the battery popped out. Note: Do not use metal tools to pry a battery off. It can puncture the battery and start a fire.
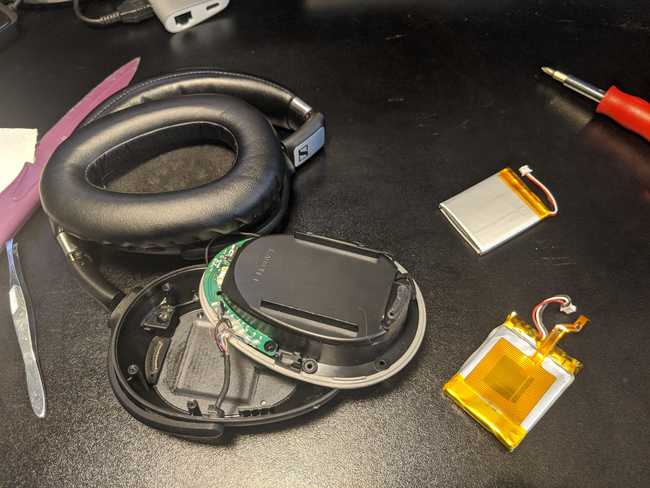
It took some wiggling to get the tweezers underneath
You'll want to keep the orange antenna that's glued to the old battery, so here I blasted it for a little while with my hair dryer to get the glue to relax.
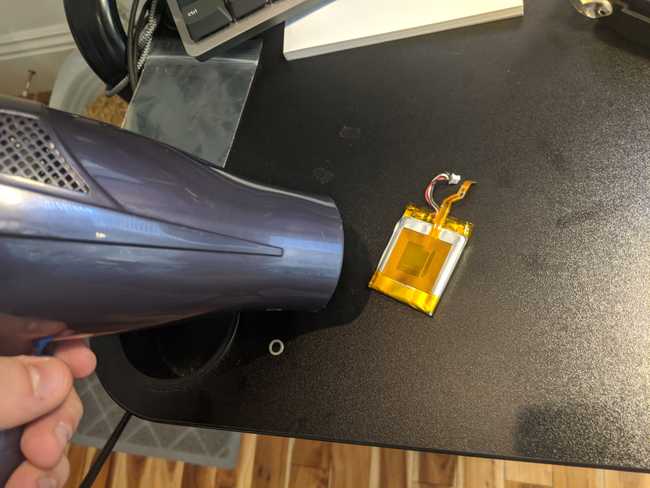
After warming the antenna, I used my plastic spudger to get the edges of the antenna up, and then used a credit card to separate it from the battery. Take your time and be careful.
Reassembly
Once you have the antenna removed, you'll want to stick it on your new battery. For me, there was enough glue left on to reattach it with no problems.
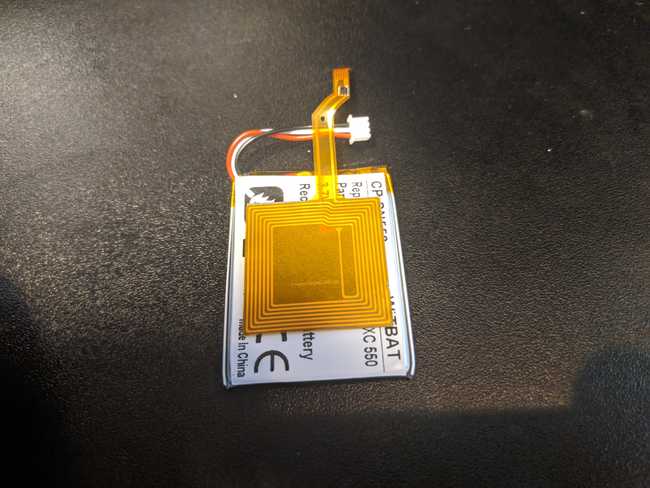
New battery with antenna
You'll want to fasten the new battery back in the place of the original. If you're fancy you might have glue for this, but I just applied some moderately strong double-sided tape.
 Don't judge me
From there, it's just a classic matter of reversing through the steps!
- Stick the new battery in
- Attach the connectors
- Replace the cup (don't forget to secure the short wire)
- Screw everything in
- Reapply the stickers (optional)
- Snap the ear pads back into place
And there you have it! You should have successfully given a new lease on life to your lovely pair of wireless headphones.
